In this article, I will explain the basic options you have for watering a vegetable bed with an automated irrigation solution and then show you how to install such a bed irrigation system in just a few steps.
First of all, let’s start with the starting point: A vegetable patch cannot be watered with the same irrigation system as the lawn, because the water jet used in lawn irrigation is far too rough for the fine plants in the patch and would damage them, and it would also wash the soil out of the patch. Therefore, a vegetable patch and all other types of patches such as herb patches, flower patches or fruit patches require the much gentler micro-irrigation.
This works with significantly lower water pressure and releases the water in fine droplets. The following two types of micro-irrigation can be used to irrigate patches:
- Micro-irrigation using a drip hose
- Micro-irrigation using sprayers
I will go into both variants in more detail below and explain what their advantages and disadvantages are.
What is always the same with micro-irrigation, regardless of whether it is implemented with drip hoses or sprayers, is the way in which it is connected to the water source.
How do you connect the micro irrigation to the water connection?
- A large 3/4 inch pipeline pipe or 3/4 inch hose is run from the water source to the location where the micro irrigation takes place (even larger is always possible, of course). There are a wide variety of connection and control options for how this pipe is connected to the water source and whether an irrigation computer is used to control it, from the simplest and cheapest possible to the most sophisticated and very convenient solutions.
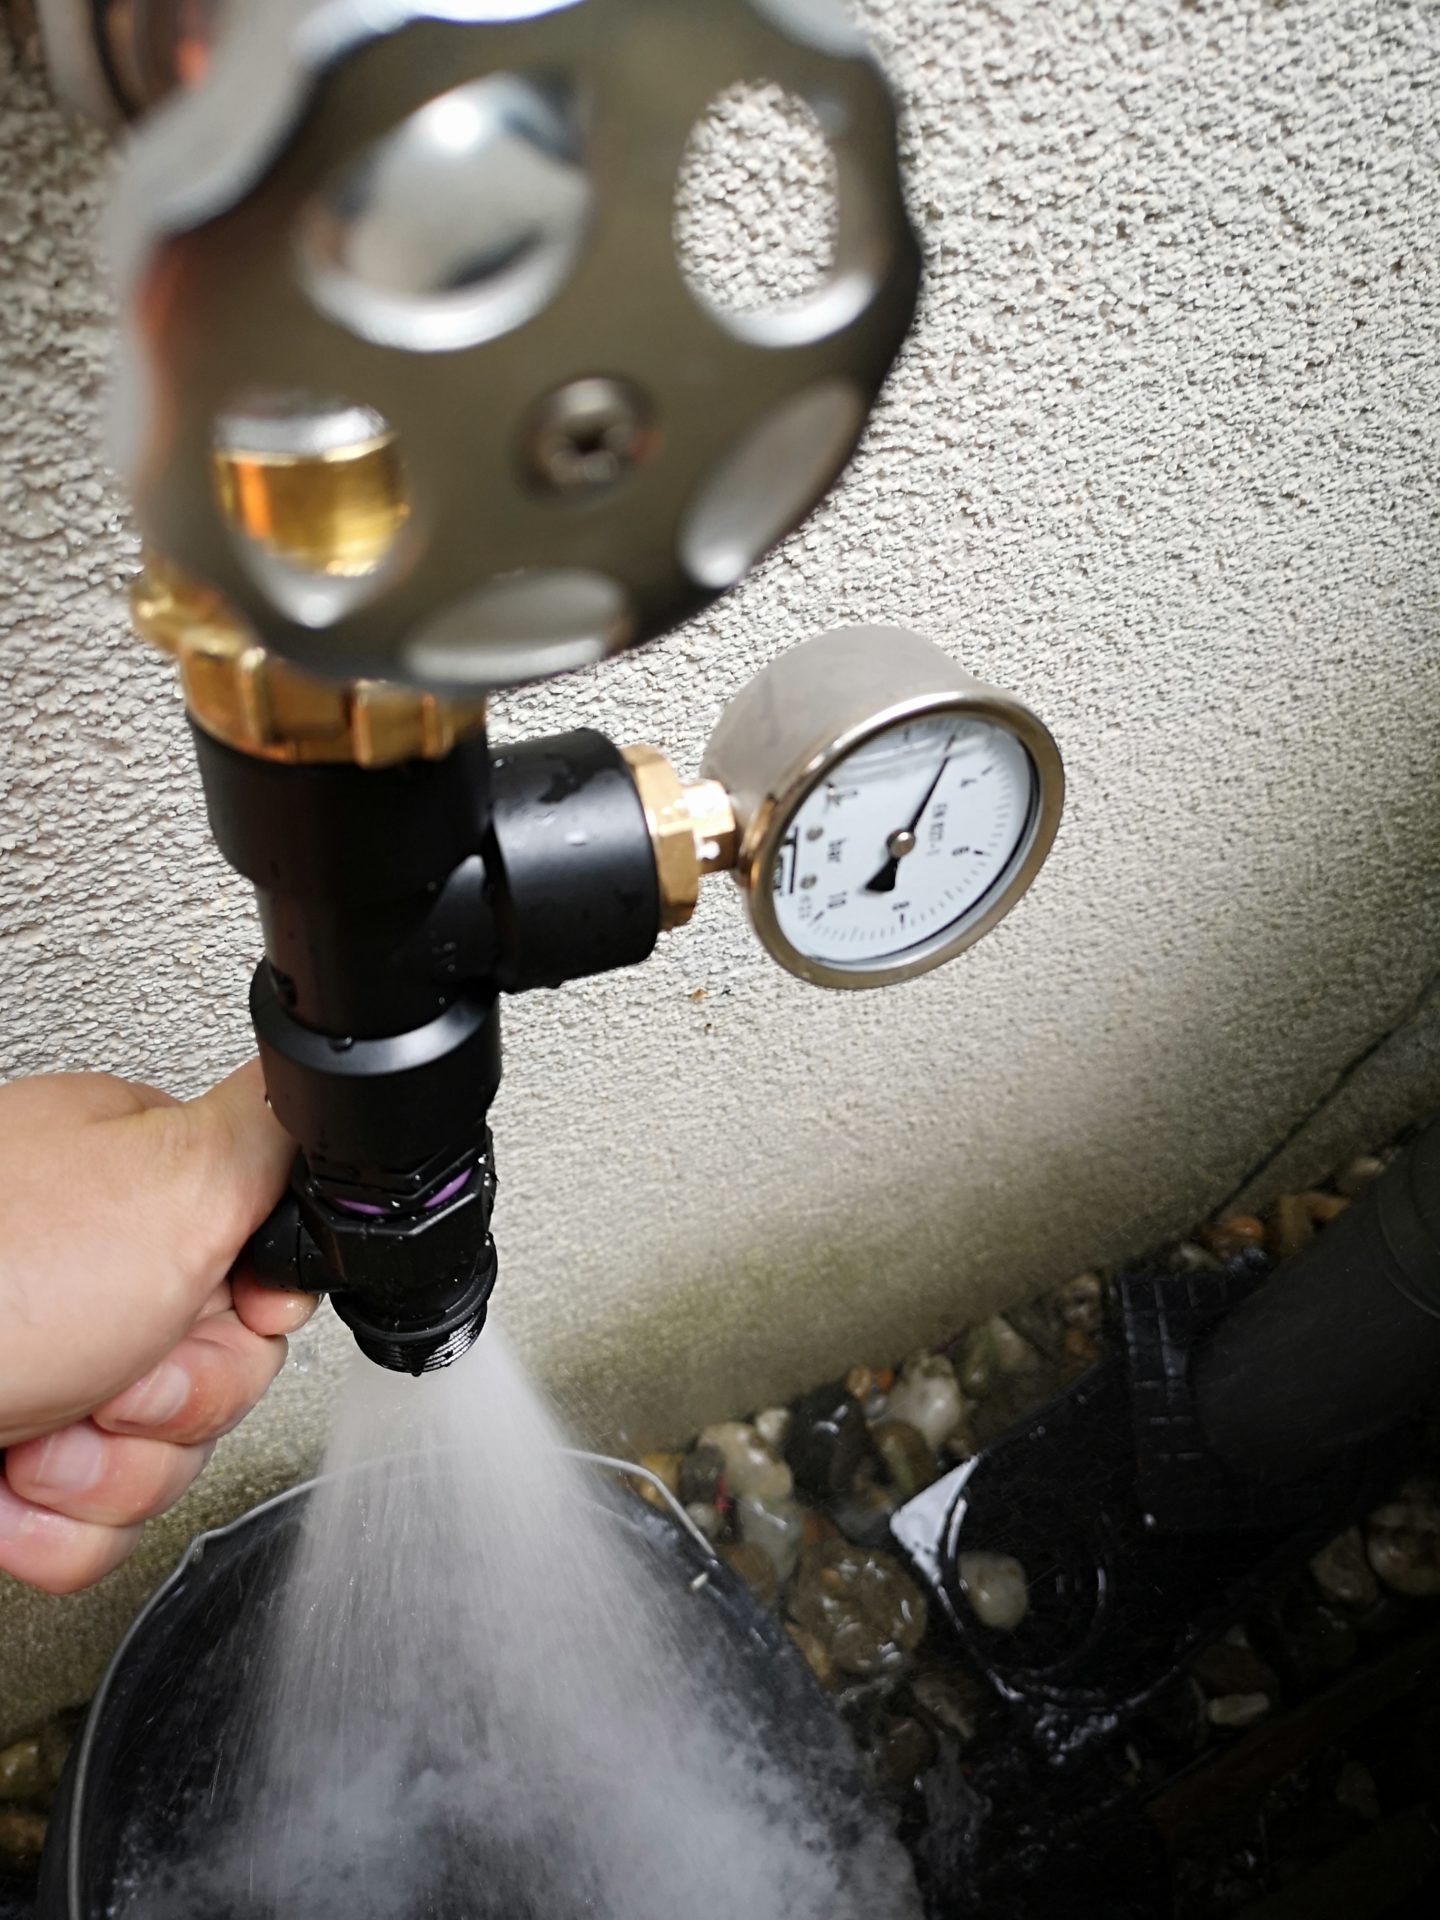
- The pipe or hose leads into a pressure reducer, which reduces the water pressure to a level suitable for micro irrigation (usually around 20 to 35 psi).
- The 1/2 inch micro irrigation supply pipe leads away from the pressure reducer. This is either used directly as a drip pipe or feeds micro irrigation sprayers. Additional small 1/4 inch distribution hoses can lead away from this and end in drippers or sprayers.
The following illustration shows a typical connection for micro irrigation. This also includes a filter built in, which is essential for micro-irrigation solutions.
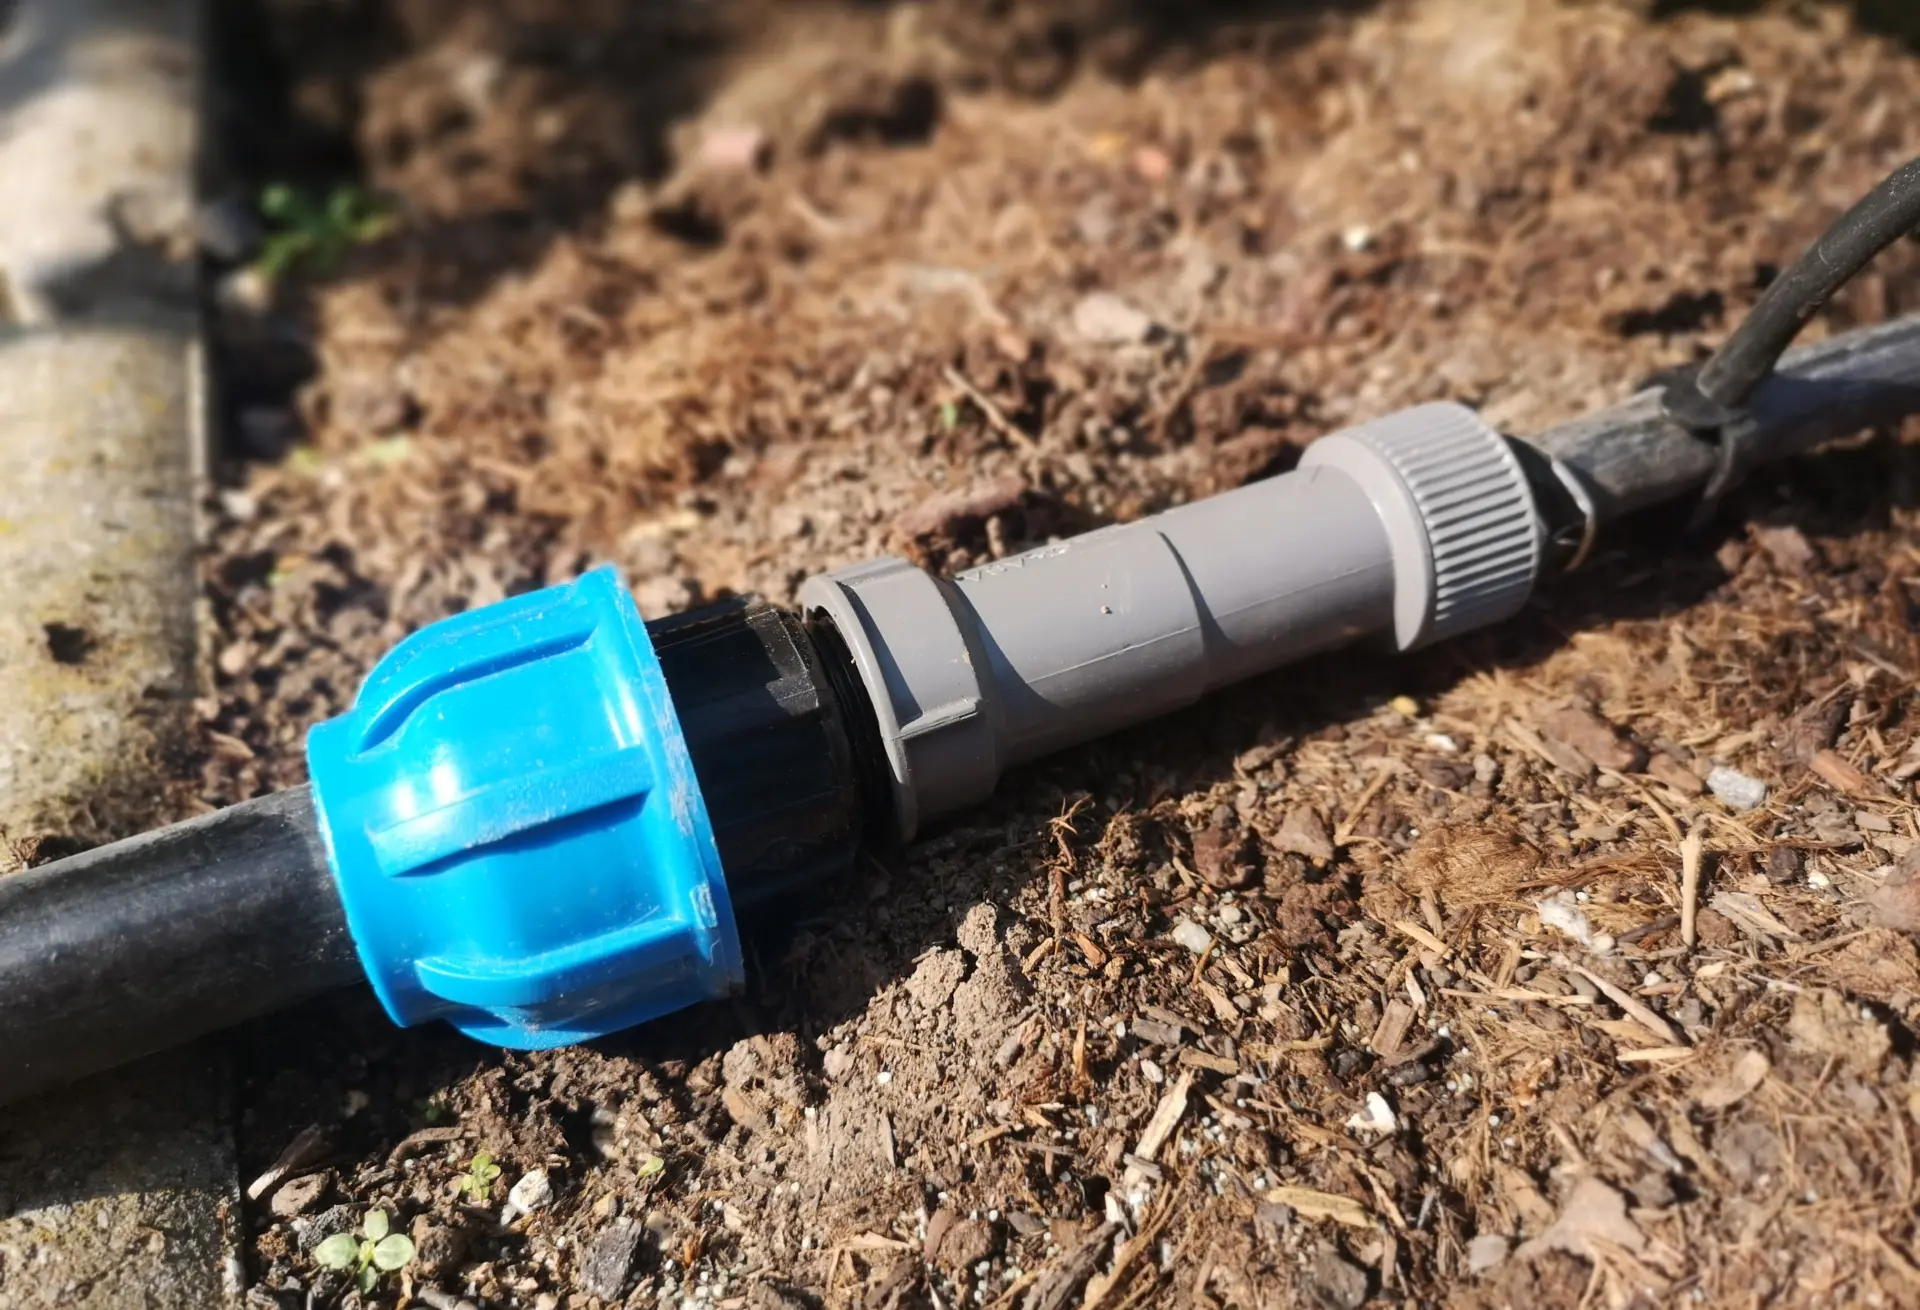
On the left is the supply line with 3/4 inch PE pipe leading away from the water connection. This is connected to the pressure reducer with a connector. To the right of the pressure reducer it continues with the 1/2 inch micro-irrigation distribution pipe. At the very right edge of the picture a 1/4 inch distribution hose branches off.
Bed irrigation with drip tube
- Advantage: The water is released close to the ground so that the leaves do not get wet when watering (less risk of rot and fungal attack)
- Disadvantage: When working in the bed, you have to pay attention to the drip tube and navigate through the tube tracks when crossing the bed
Note: In raised beds, the drip tube is usually always preferred. Sprayers are only used in exceptional cases, e.g. when planting new plants or with particularly delicate plants.
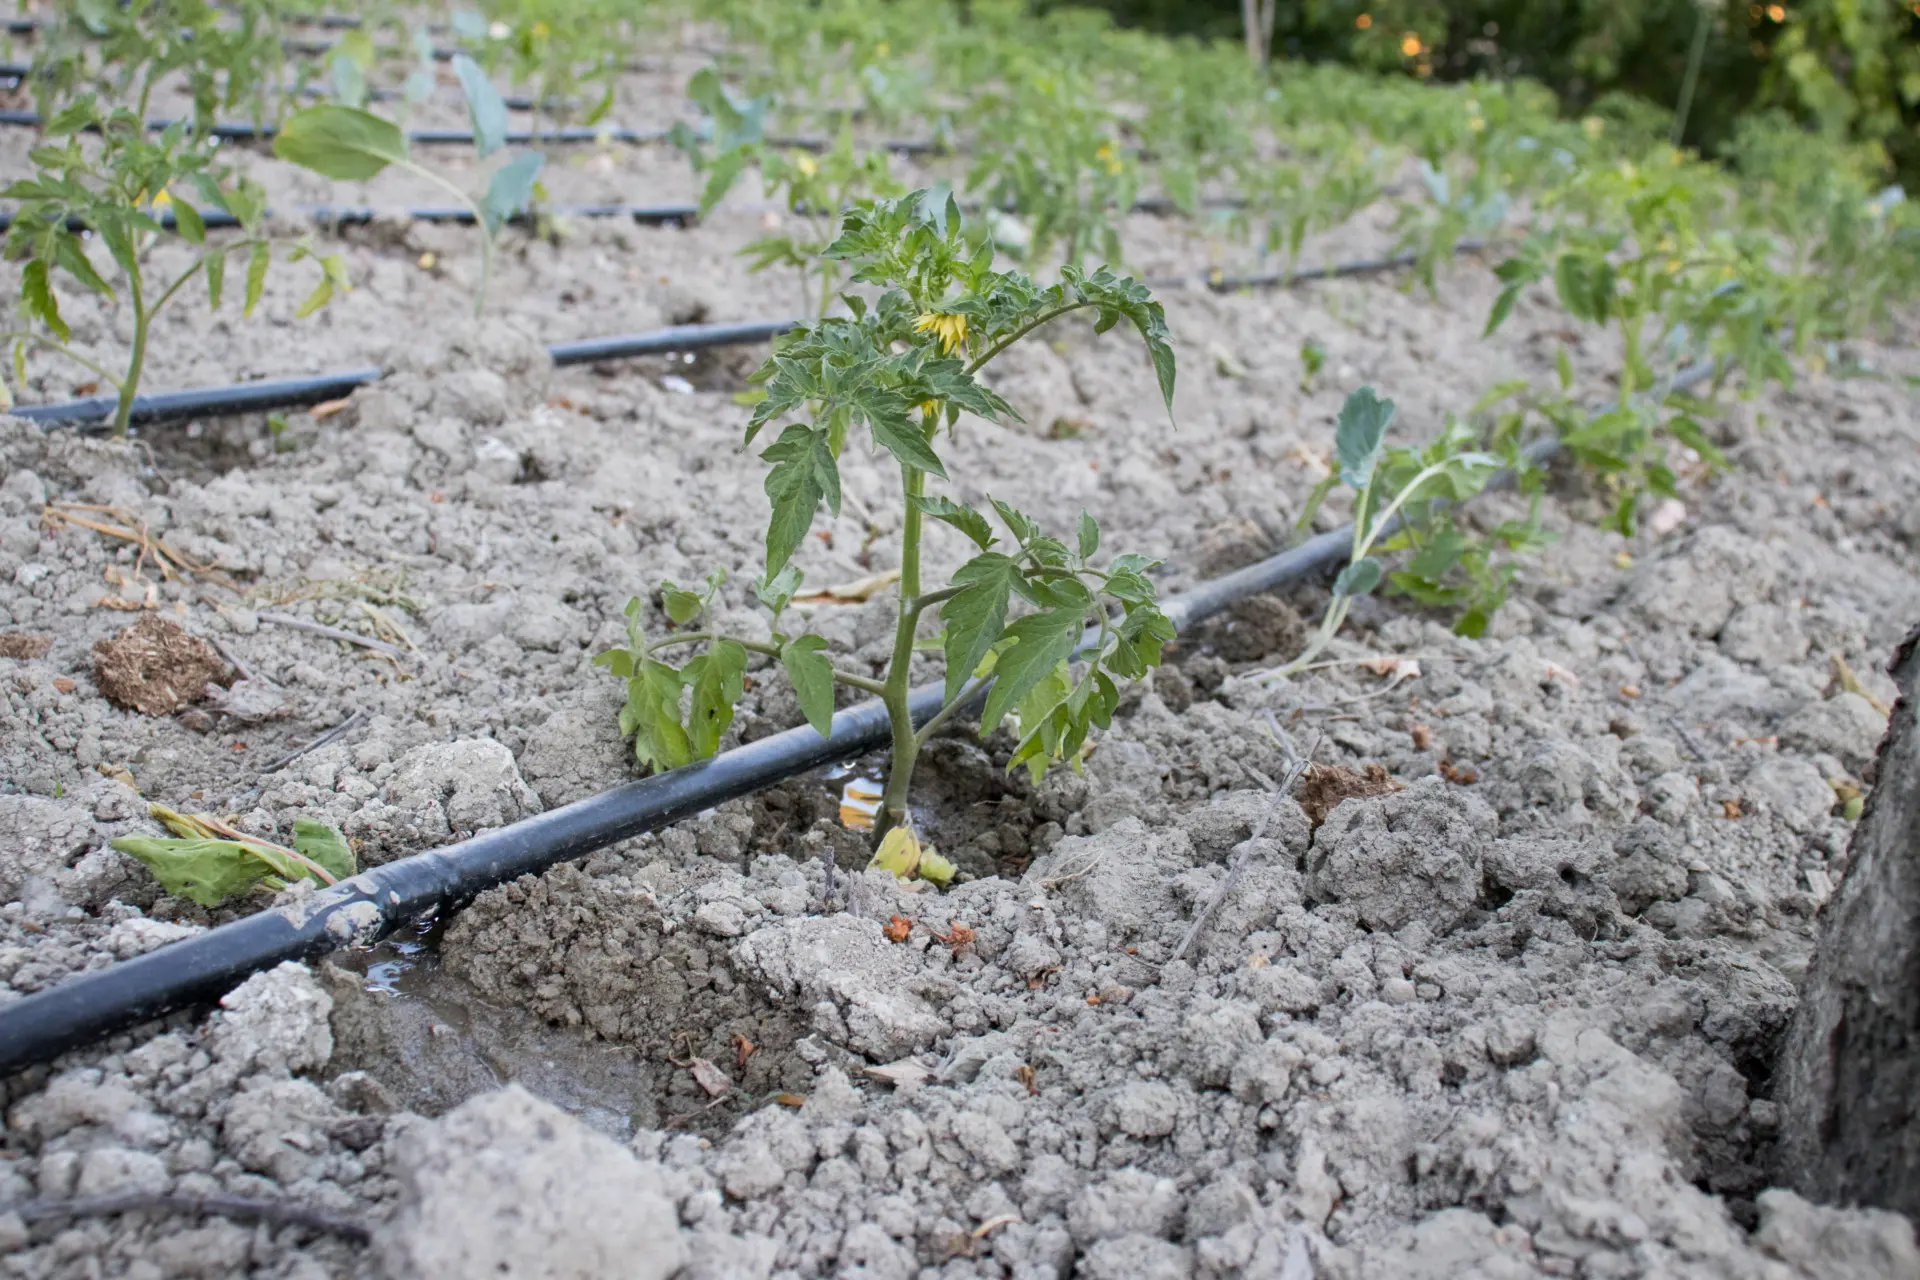
Drip tube laid in strips through the bed
In this variant, you lay the 1/2 inch drip pipe in strips through the bed, starting from the pressure reducer. The distance between individual strips should be about 12 inches. If it is not a normal bed but a raised bed, then it is better to leave a little less.
Such drip pipes are available ready-made with emitters built into them, or you can use the normal 3/4 inch micro-irrigation pipeline pipe and screw drippers into it yourself. This is only slightly cheaper than a ready-made drip pipe, but can be useful if not all plants in the bed have the same water requirements: By selecting different drippers, you can specifically determine where and how much water should be released. And if the distances between the individual plants are irregular, you can also deliberately place the drippers accordingly.
Irrigating the bed with micro-irrigation sprayers
- Advantage: The sprayers are located at the edge of the bed and do not interfere with work in the bed. You can move around freely, dig, etc.
- Disadvantage: When spraying, the leaves get wet and tall plants can hinder watering
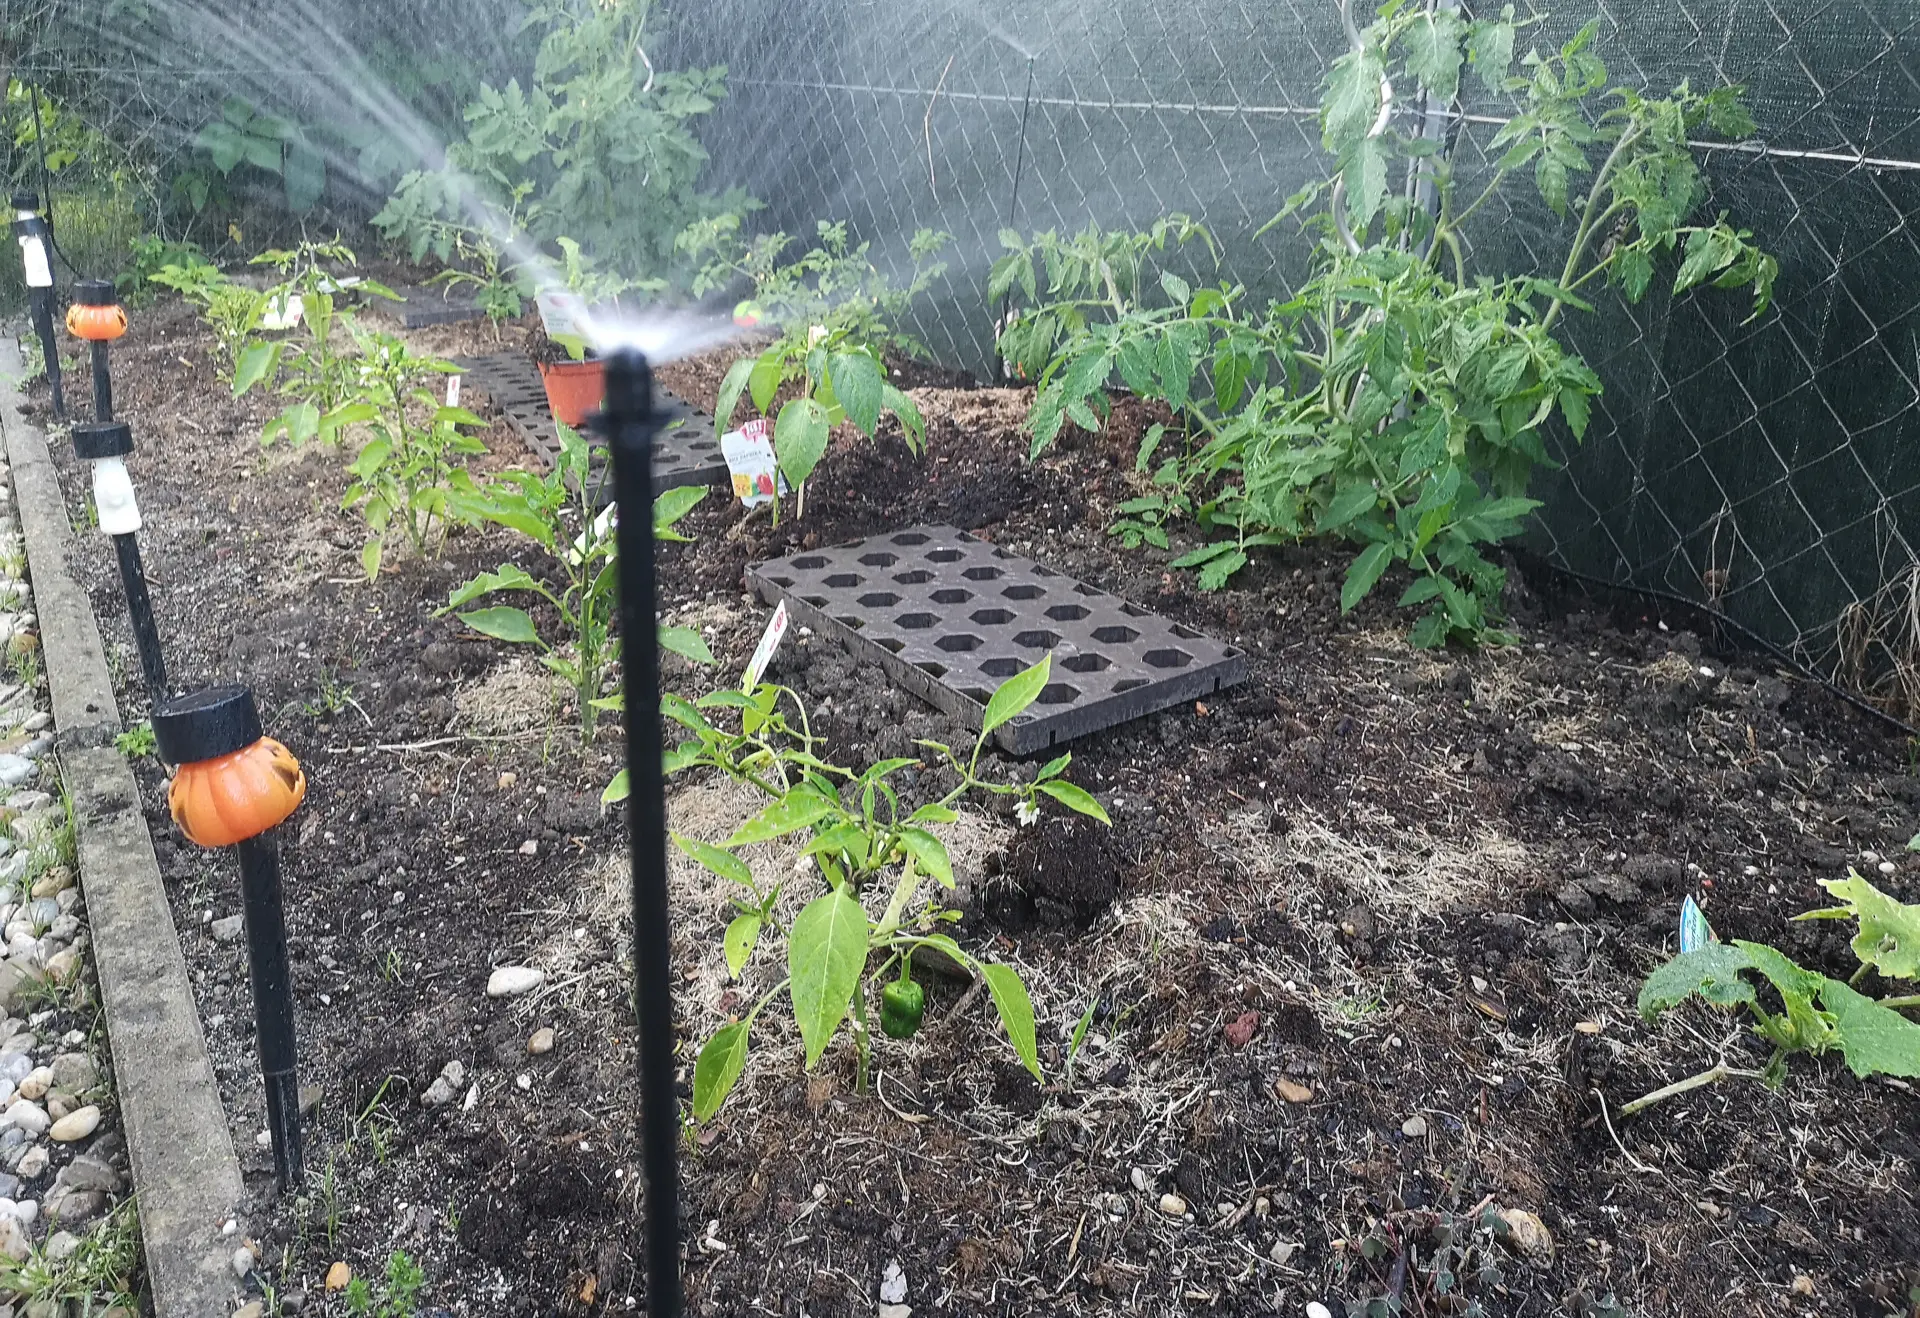
Irrigation with sprayers placed at the edge of the bed
Unlike irrigation with a drip pipe, where the pipe is laid above ground in strips through the entire bed, the supply pipe when irrigated with sprayers either remains at the edge of the bed or is not visible at all. This can be achieved, for example, by laying it completely underground along the edge of the bed and only having thin 1/4 inch distribution hoses branch off upwards directly to the sprayers at those points where the sprayers are.
A third option is a mixed form. For example, laying the supply pipe underground along the edge and coming up at two points with the 1/4 inch distribution hoses. From there, you then continue above ground with the 1/4 inch hoses and suitable L or cross connectors and connect several sprayers in each case.
Which installation variant you should give preference to depends primarily on how important it is to you to keep the surface as free of pipes and hoses as possible and on how large the bed is. The 1/4 inch distribution hoses have a limited flow capacity and therefore reach their limits very quickly. A rough guideline is to lay them to a maximum length of 50 feet. But even before this limit is reached, the number of sprayers that can be supplied is likely to be the limiting factor. This is because the water flow is severely limited due to the small cross-section in the 1/4 inch hose.
How many sprayers you can attach to the 1/4 inch hose depends in detail on which type of sprayer you are using and which water requirements they have. In my practical example, it was still possible to attach two 90 degree and one 180 degree sprayers to a 1/4 inch line without any problems. I wouldn’t recommend much more than that, though; it would be better to make further branches from the 1/2 inch supply pipe.
Positioning the sprayers
The following three types of sprayers are generally used for watering beds:
- 90 degree sprayers
- 180 degree sprayers
- 360 degree sprayers
Each of these is mounted on spikes or extensions that ensure that the sprayers spray from as high a position as possible in the bed and are therefore not obstructed excessively by tall plants.
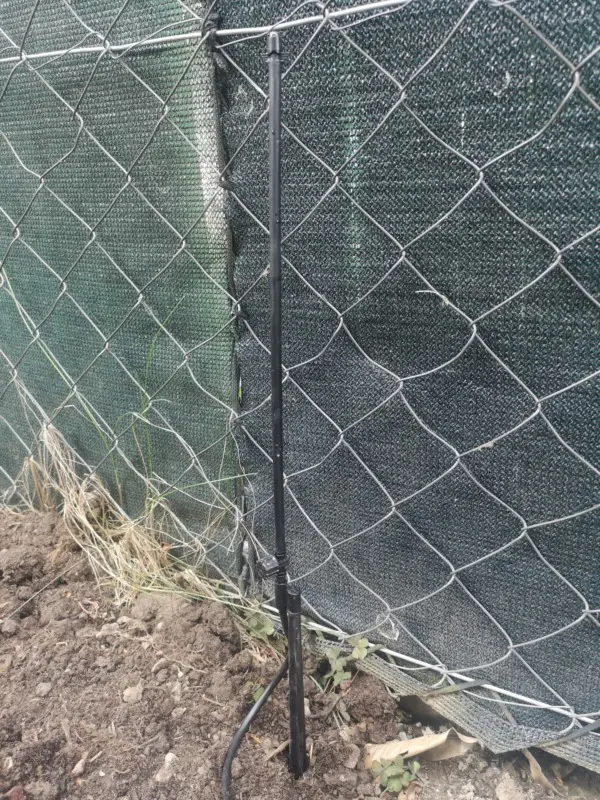
The actual sprayer sits right at the top of a 12 inch extension, which in turn is mounted on a 12 inch spike that is partially sunk into the ground. In this way, the sprayer in this example is about 16 to 20 inches above ground level.
The sprayers have, as their name suggests, a quarter-circle, semi-circle or full-circle spray pattern.
The 90 degree sprayers are placed in the corners of the bed. A bed irrigation system could, for example, consist of 4 90 degree sprayers placed in the corners. Or, if the bed is quite small, even just two 90 degree sprayers, positioned diagonally to each other, i.e. one at the bottom left and the other at the top right.
The 180 degree sprayers are placed in addition to the 90 degree sprayers at the edge of the bed if the bed is not square but elongated or the spray range of the sprayers is not sufficient to water from one edge to the other.
A 360 degree sprayer can optionally be placed in the middle of the bed. In large beds, this can also be used several times in the bed.
In principle, using a larger number of sprayers has the advantage over fewer sprayers that irrigation is less affected by individual obstacles. A bed is alive and some plants shoot up high and deflect the spray. If each area of the bed receives water from several directions, this can be easily balanced out. With more sprayers, a greater uniformity of the water supply can also be achieved.
Example of a bed irrigation system with sprayers
In my example, I am using a ready-made bed irrigation set from Antelco and Teco, costing around $35.
The set includes 400 feet of 1/4 inch hose and components for up to 6 sprayers. This includes 6 spikes (including hose connection) and extensions, as well as a valve for each of the 6 sprayers to regulate the water flow. There are also 6 branches with which you can connect the 1/4 inch hose to the large 1/2 inch micro-irrigation pipe and ten end plugs to close the pipe ends.
There are even eight sprayers included: four 90 degree sprayers and two 180 and two 360 degree sprayers. This means you can vary which 6 sprayers you ultimately want to use.
There were also two T-piece connectors included, which are very practical if you want to split the 1/4 inch line above ground into several sprayers.
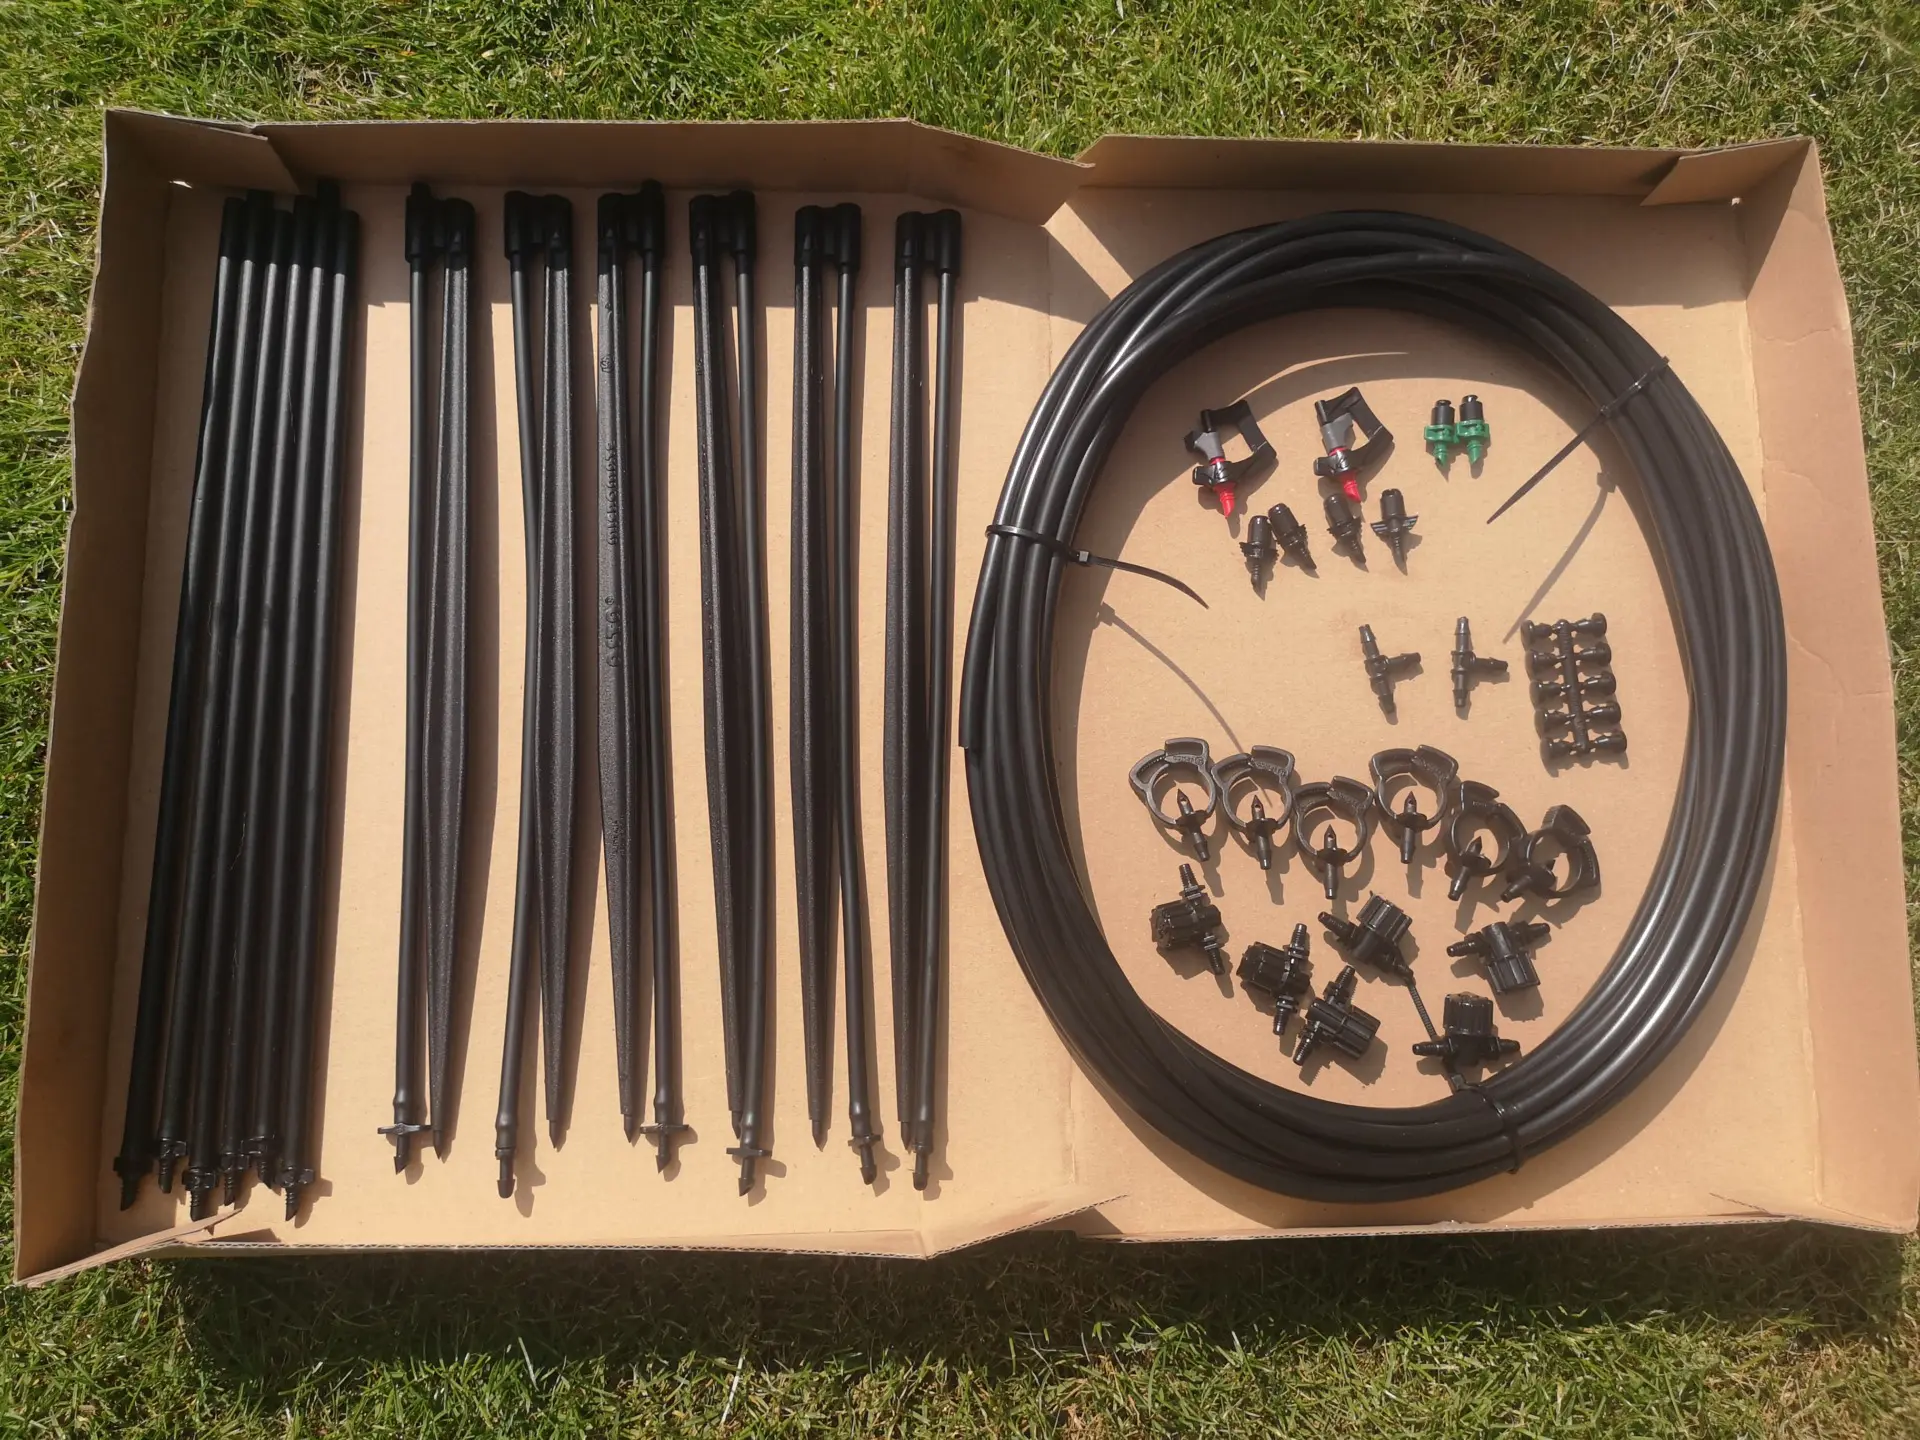
Contents of the ready-made bed irrigation set
The first impression of the set was a good one: the spikes are robust. This is a major flaw in some other micro-irrigation systems, as the extension pipes are often extremely delicate and thin, so that on the one hand they are easily damaged and on the other hand they are very difficult to attach or require constant readjustment because they do not stay firmly in place.
Each spike has a piece of supply hose attached, at the end of which there is a spike. You can connect the spike directly to a supply line with the spike, or pull out the spike and attach the end of the hose to a branch. According to my test, you do not even need to sink the spike completely into the ground; even if you only sink it partially, it is already quite stable. This gives you additional height.
The included branch connectors are very practical: to attach them, simply place the clamp on the supply pipe at the desired location and then tighten it. The branch connector’s spike then drills into the pipe and the branch is created. This works very well in practice, is leak-proof and is much quicker and cheaper than making the branch with T-pieces. This can be very expensive, especially for larger micro-irrigations.
Another positive feature is the possibility of installing a valve to regulate the spray jet. This is installed between the spike and the extension.
Assembling the sprayer
With a little experimentation, you will find out how it works and which combinations are possible, or you can look it up on the web. The micro sprayer is a product of the Australian company Antelco and is sold there under the name “Micro Spray Stake Assemblies”. The other components of the set are products of the Italian company Teco.
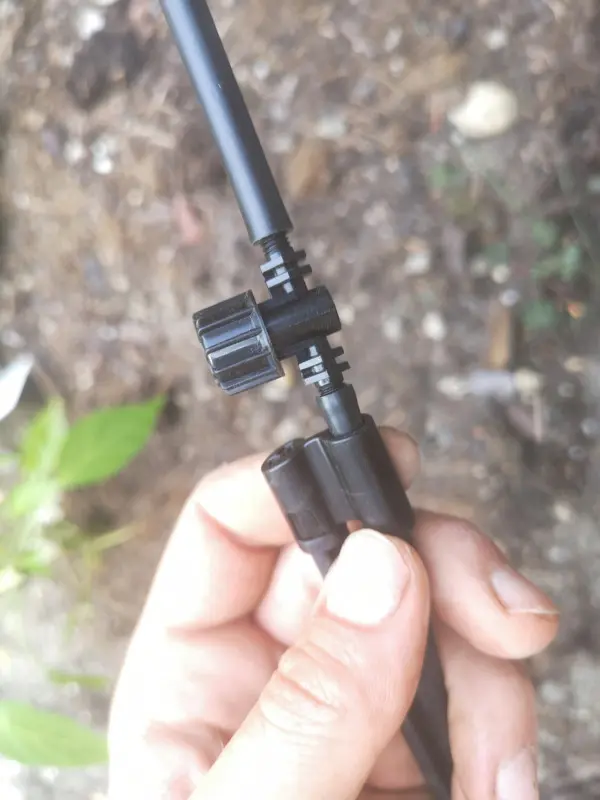
This is how it works: The valve part is screwed into the hose connection of the spike and the extension into the valve part. The nozzle is then screwed into the upper end of the extension.
Positioning the sprayers in the bed
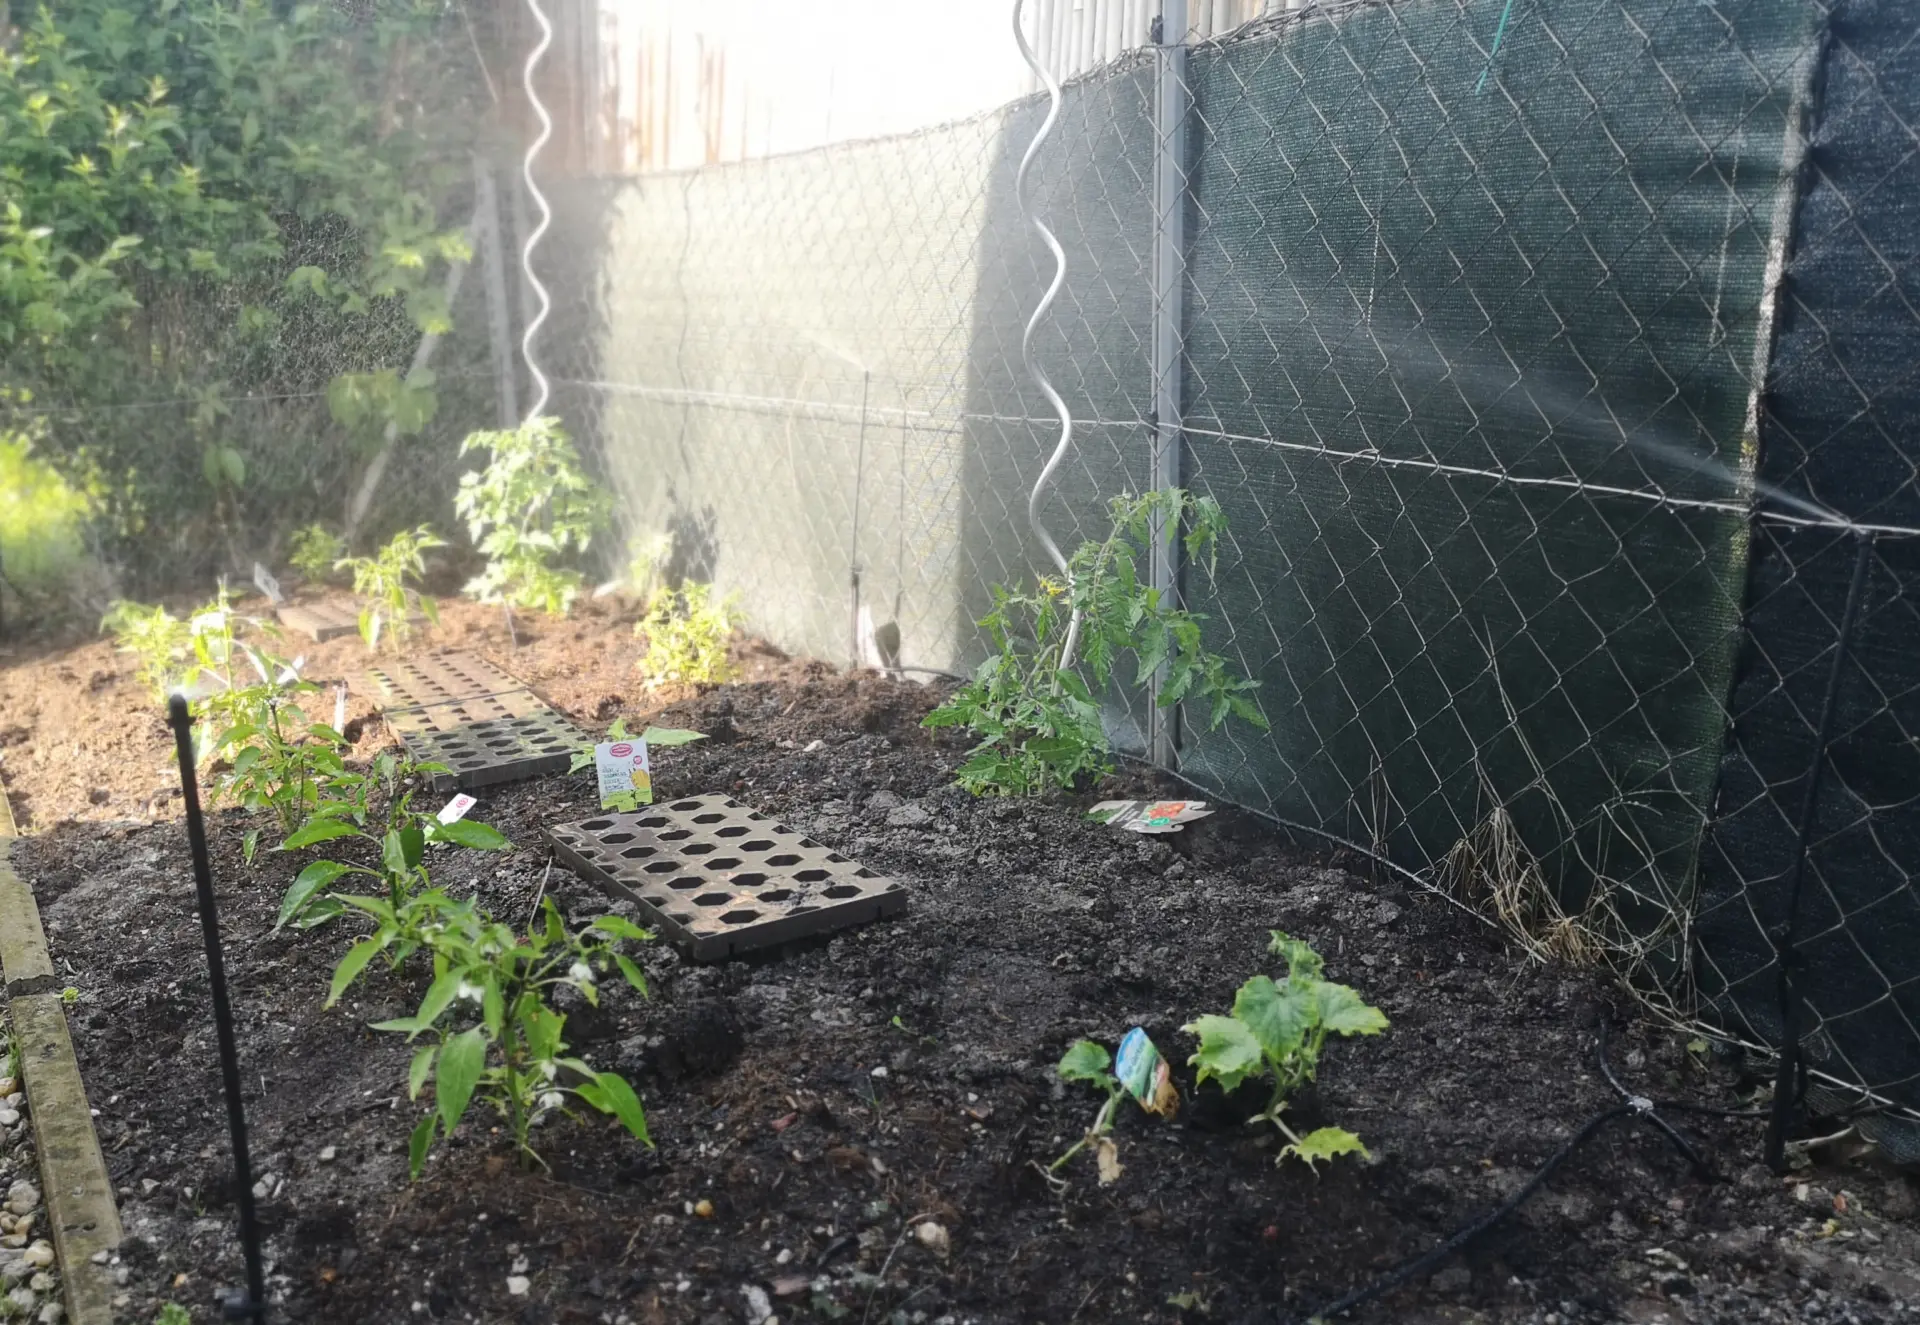
My example bed is about 13 feet long and 5 feet wide. It is positioned in such a way that it is not a big problem if the water goes a little over the edge. If that were a problem, you would have to work more precisely and in more detail or use strip nozzles. In the example bed, I use 5 of the 6 spikes: one in each of the 4 corners and an additional one in the middle on the long side of the bed in the back area. I deliberately do not use the sixth sprayer on the long side in the front area of the bed because the bed is walked on here and the sprayer would therefore be too much in the way. It would be disruptive or annoying when working in the bed every day to always have to pay attention to it.
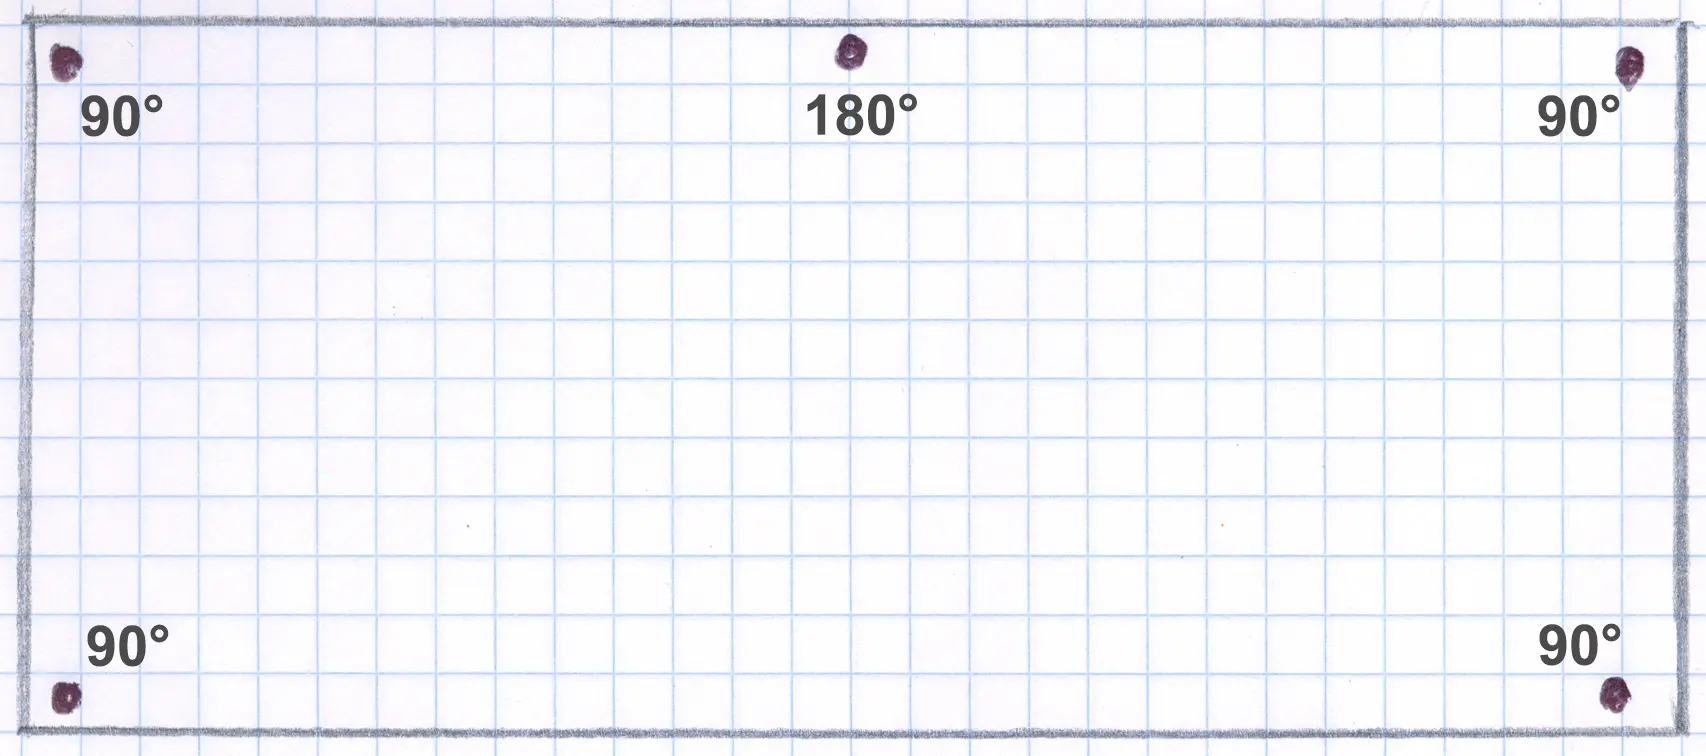
Positioning of the sprayers in my example vegetable patch
And this is what it looks like in real life:

Bed irrigation with 5 sprayers (those in the two left corners are a little harder to see)
Conclusion: For around $35 you get a solution that works well in practice, is very easy and quick to install and is also built so sturdily that you can enjoy it for longer.
